
Opt Out Guides
Kochava Opt Out Guide
Privacy Writer
A. J. MercerAva J. Mercer
Updated
Read
5 min

Kochava can display information that affects user privacy, such as name, contact details, and address. This guide explains how adjusting device settings and sending a request help control how data signals associated with your device or app activity. Kochava works within a measurement platform context, where app developers, advertiser teams, and partner services analyze traffic across mobile environments. You will learn how to make a request, click the verification code, and confirm completion. We also show how to use Apple and Google devices to limit interest-based advertising, change ad personalization, and reset your advertising ID. Simple instruction steps and visual guidance support clear navigation.
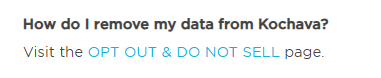
How to opt out of Kochava
Visit the official privacy page, submit your ad ID, and confirm using a verification code. Processing usually completes within a few days.
Checklist:
- Open the official opt-out form
- Enter the ID
- Complete CAPTCHA
- Confirm verification
- Save the confirmation email
- Set a reminder to re-check later
Find out if your private details were exposed
2,865,794 have already used our service
Kochava – Quick Facts
| Parameter | Value |
| Domain | kochava.com |
| Data Types | Contact info, addresses, device, and app identifiers |
| Opt-out Methods | Form/email |
| Identity Verification | Code or confirmation email |
| Typical Response Time | 3–10 days |
| Re-listing Risk | Medium |
About Kochava
Kochava is a measurement and attribution platform. The company works with app measurement and advertising tools. It may collect certain data signals for the purpose of analytics and reporting. These signals can come from commercial feeds, public sources, or in-app interactions shared by developers and client teams, depending on configuration and handling practice.
Common data you may find:
- Name variations
- Phone numbers
- Email addresses
- Current and former addresses
- IDs linked to device activity
- IP, OS, and web interaction references
- Relationship or household indicators
- General demographic ranges
Step-by-Step Guide
Open the official opt-out form
On the website, open the privacy policy page, then look for the opt-out option. Confirm you are on the correct domain and avoid third-party intermediaries.
Submit your identifiers (ad ID + CAPTCHA)
Enter your ad ID. Complete the CAPTCHA and submit the query.
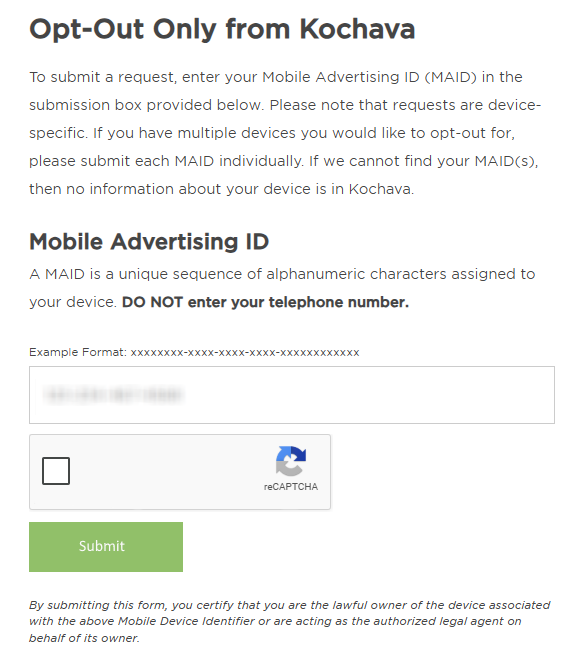
Verify via code or link (email/SMS)
Check your inbox or SMS for a verification code. If you do not see it, check Spam or wait briefly before re-sending.
Confirm deletion / Do-Not-Sell request
Choose the action that fits your needs. Some interfaces allow adjustments to personalization based on your preference.
Track confirmation & timeline
Save the notification email. If you receive no confirmation within 10 days, contact the department listed in the privacy notice.
Timelines, Verification & What to Expect
Once verification is complete, most applications are processed within 3–10 days. You may receive a confirmation message explaining that collection and processing changes were applied. If no notification arrives, check Spam or Junk folders first. If there is still no update, resubmit once and then contact the legal department using the details posted in the privacy note. Keep this correspondence for compliance records and to support any future follow-ups. Processing times may vary.
Edge Cases & Troubleshooting
- No access to original email/phone: Use alternate verification if provided.
- “Record not found”: Try another email or ID.
- CAPTCHA errors: Refresh or retry later.
- Code not arriving: Check Spam and resend once.
- Region restrictions: Use region-specific privacy links if prompted.
- Listing vs account confusion: The purpose may differ; read the form descriptions.
- Failed attempt: Wait briefly and resubmit.
Will my data reappear?
Re-listing can occur because partner data sources and feeds sometimes refresh. To prevent recurrence, set a calendar reminder every 3–6 months to check your status. You can also limit ad tracking and use the toggle that disables ad personalization. On IOS, controls are located in the system menu. On an Android device, similar controls appear in the ads privacy section. This feature is default in most OS builds and can help guide how to remove ads. You can also cancel certain signals with Apple’s and Google’s controls supported in their framework.
Related Removals
- LiveRamp
- Tapad
- Oracle Advertising
- Experian Marketing Services
- Neustar
- Acxiom
- BlueKai
- Epsilon
Manual vs Assisted Removal
Manual:
- Pros: Full visibility, user control, and the ability to monitor updates directly.
- Cons: Requires time and recurring checks to maintain results.
Assisted:
- Pros: Can streamline the process, track progress, and send reminders.
- Cons: A service cost.
“Excellent”
We remove your data for you - faster, verified, trackable.
Discover Which Sites Share Your Private Details—Instantly and Free.
2,865,794 have already used our service
FAQ
Receive expert privacy advice by email - 1-2 times per month, no fluff.
Share Article

Posted by Ava J. Mercer
Ava J. Mercer is a privacy writer at ClearNym focused on data privacy, data broker exposure, and practical privacy tips. Her opt-out guides are built on manual verification: Ava re-tests broker opt-out processes on live sites, confirms requirements and confirmation outcomes, and updates guidance when something changes. She writes with a simple goal - help readers take the next right step to reduce unwanted exposure and feel more in control of their personal data.
76 Articles
